I’ve been working on volumetric clouds lately. It’s very exciting to do and pretty tricky to get right. I thought I’d share some tips and tricks I learned and other resources to render cloud-like volumes efficiently.

https://www.youtube.com/watch?v=mJf5xJkHVK8
The Basics
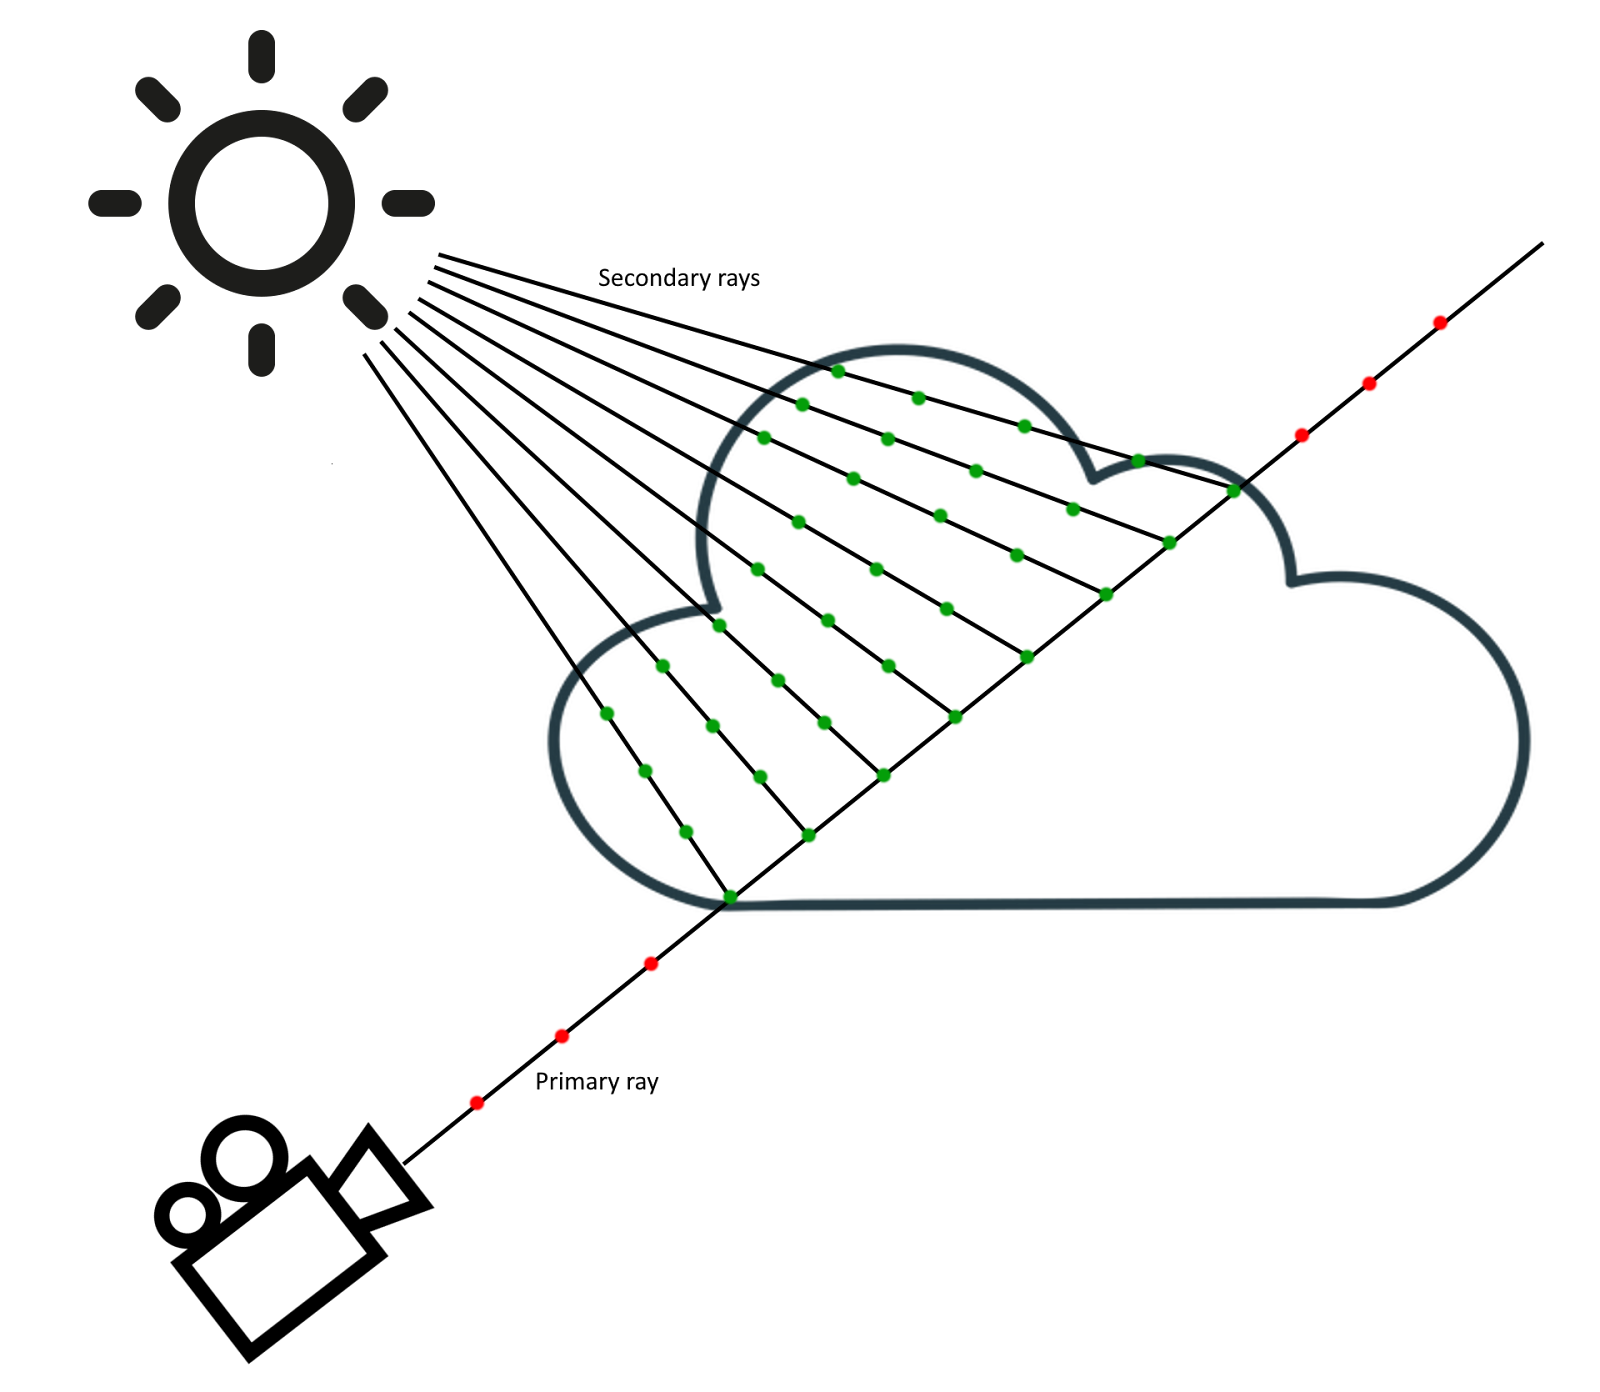
Rendering volumes is done in Post. for each pixel, shoot a ray going forward, pick some samples, then shoot some rays towards the light. Compute how much light reaches the observer inferring a color.
These can add up to many samples so the game is going to be limiting them as much as possible.
Sampling density
For each sample, you’ll need to compute its density. You’ll want to use a noise called perlin-worley. Here’s a wonderful resource: https://www.shadertoy.com/view/3dVXDc
In practice, this will be a 3D texture and you’re going to want to keep it fairly small especially for web if you want the web-page to load fast. The texture will need to be tileable.
I use a 128x128x128 texture which is too small to produce interesting features. It’s big enough to include 2 or 3 Fractal Brownian Motion (FBM) levels but no more. In the shader, since the texture is tileable, you can sample from it at different frequencies to get higher detail noise.
Computing color and opacity
As light travels through the clouds, it’s scattered in multiple directions. We need to compute how much light reaches the primary ray sample (along the secondary ray), how much of that light is scattered towards the observer, and how much of that light reaches the observer.
Luckily, these functions are more or less well established. A tricky part is that you’re working in HDR so you can’t expect light to be properly normalized between 0 and 1, you’ll need to choose a light intensity for the sun and tune the function parameters to reach something visually pleasing.
The tutorial from SimonDev is a great resource to get started and explains this in much more detail: How Big Budget AAA Games Render Clouds
Optimization
Now here are some more “advanced” topics that I experimented with. Limiting the number of samples AND texture lookups is the key to performance.
Log Scale
The Most important optimization for large scenes is picking samples on a logarithmic scale.
A sample represents cloud density for an area in 3D space. When close to the camera, a sample will represent a very small 2D area in XY view-space. When far away, it will represent a very large area in XY view-space (assuming a perspective camera). The sampling along the z-axis needs to reflect that, so you need more samples up close and less samples far away. If the amount of samples between the x-y axis and z-axis is not balanced, you may reach acceptable renders when the camera is still but when the camera rotates around the cloud, lighting won’t make sense and it’ll look ugly.
The frustum above is the sub-space covered by a single sample. Here, the frustum is more or less balanced, almost a cube. Over-sampling would result in a frustum that’s squashed and under-sampling in a frustum that’s very long.
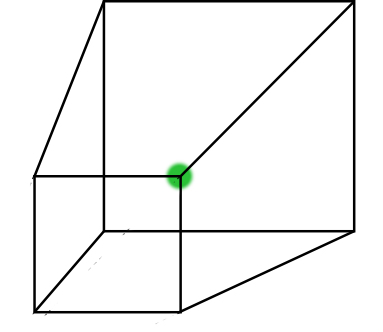
The scene will ultimately be under-sampled to get a good frame rate. I go with about 10 times less samples along the z-axis compared to the xy plane coverage. By using a logarithmic scale, at least the sampling is even for near and far samples.
Jittering samples
It’s not really an optimization but more of a necessity. Given that the volume will ultimately be under-sampled for performance, the volumes will suffer from banding patterns. By jittering the sample positions, we reduce banding artifacts at the cost of dither patterns.

Banding is obvious here in the threejs volumetric cloud example when purposely removing sample jitter.
To limit the dither patterns, you’ll want to use “blue-noise” to jitter the sample positions. Blue noise is intrinsically tileable and easier to blur-out than white noise.

This lib provides a bunch of pre-computed blue-noise textures: GitHub - Calinou/free-blue-noise-textures: Free 2D, 3D and 4D blue noise textures from the Moments in Graphics blog
Limit number of samples
For the samples towards the light, I use a linear scale. Perhaps one might want to compute the optimal frustum shape for those samples relative to the view direction and light vector, but it seems overly complex.
Anyhow, it’s less important because we should limit the distance covered by the secondary ray. Depending on your scene size, you might want to cover only a 1000 meters towards the light or so. That means the clouds will only “self-shadow” for a limited distance.
You may want to fade-out the importance of further away samples to avoid a hard margin.
For further away “primary” samples, reducing the number of secondary samples is very effective and doesn’t affect quality much. Reducing the number of samples “logarithmically” with respect to the primary sample distance seems to make sense.
When the accumulated density of primary samples reaches a threshold, just stop sampling along the ray and consider the cloud is fully opaque.
Reduce the number of samples towards the light for primary samples with low density. The lighting of the sample will be less accurate but the sample is transparent so it matters less.
Minimize texture lookups
The “perlin-worley” noise texture, as discussed above, is only 128 x 128 x 128. That amounts to a 2 mb file so there’s room for larger resolution but the size in memory will grow quickly. So my approach has been to sample the same texture at different frequencies to get more fractal levels of detail. However, sampling the texture becomes a bottleneck, therefore, I limit the number of “levels” for far away samples. This definitely affects the quality of further away clouds but it helps a lot with performance. Blending between LODs to get a smooth transition is important.
Edge preserving Kawase blur
In order to limit the samples and avoid banding, blue noise is used to jitter the samples. This effectively removes banding but the dither patterns now need to be removed.
Kawase Blur is a very cheap and effective blur with its drawbacks. It’s a kind of box-blur that also produces banding patterns. I use blue-noise again to jitter the Kawase blur samples which luckily doesn’t produce any more noticeable dither patterns.
Further away “surfaces” receive a bit of extra blurring but not so much as to produce a depth of field effect.
Each Kawase blur pass picks 4 diagonal samples per pixel. In order to blur while preserving edges (effectively blurring out the dither patterns but preserving the cloud details), the samples that have very different luminosity or “depth” relative to the center point are weighed less.
SimonDev again gives a great explanation on how kawase blur works: How Big Budget AAA Games Render Bloom
Temporal accumulation
Instead of using kawase blur, Temporal accumulation or Temporal Anti Aliasing (TAA) can very effectively remove dither patterns when the camera and clouds are still. As soon as things are moving, the previous frame needs to be reprojected to match the new frame. TAA techniques work extremely well for hard surfaces but cloud surfaces are inherently fuzzy.
I personally gave up on temporal accumulation. Although I didn’t do a very good implementation that would include a pass for computing velocity vectors etc.. I’m convinced that it will be very hard to apply to clouds.
Multi resolution rendering
In order to limit the number of samples, you may want to render the clouds at low resolution first which gives a quick indication of areas where less or no samples are necessary. You can accumulate the low resolution render with higher resolution passes with less overall samples. This is a complication I did not go for but I suspect it can be very effective.