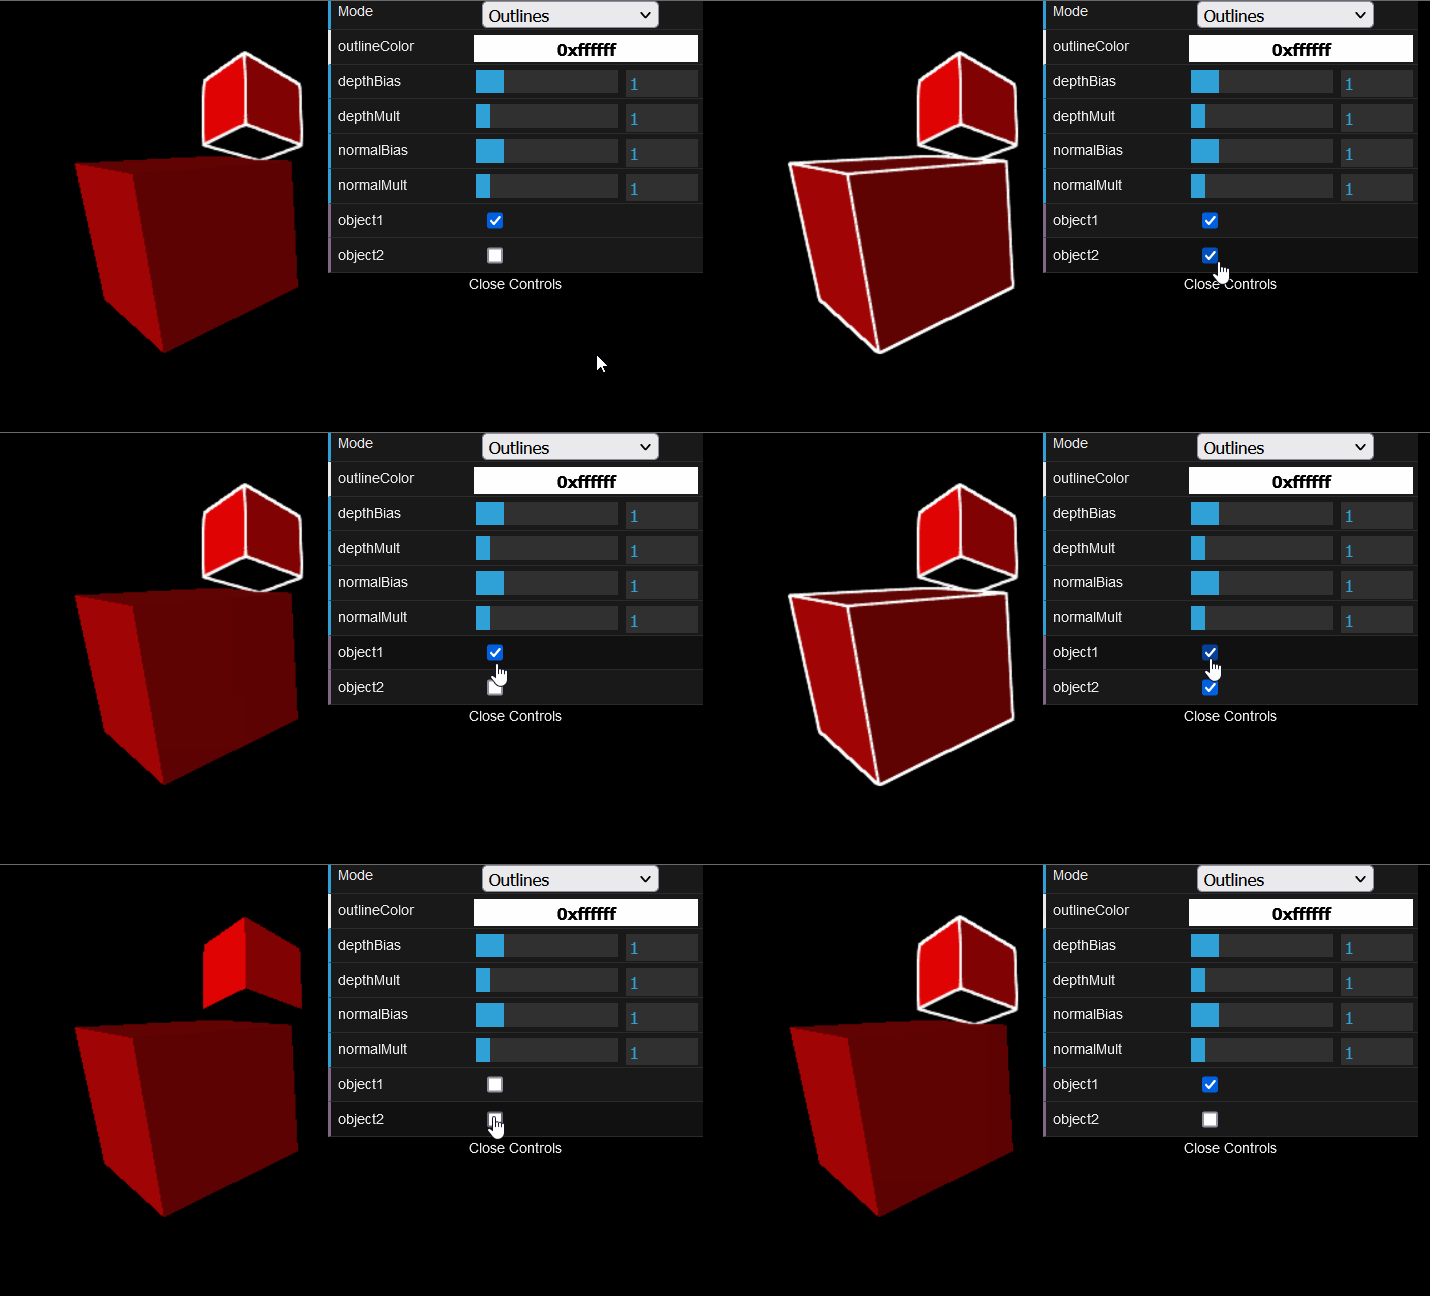
How to render full outlines as a post process - tutorial

I was looking for an outline implementation that could show all edges (like the middle image), not just the outer boundary (left), like the current outlines post processing example. I couldn’t find one, so I wrote one up and thought I’d share it here.

Hope this is helpful for anyone searching for this particular kind of effect! Happy to hear any feedback about implementation too.

My main “todo” here is to explore switching to a WebGLMultisampleRenderTarget to remove the need for the FXAA pass.

24 Likes

This is great! Thanks a lot for sharing and the tutorial. Presumably, there’s no way to control individual mesh edges. For example, changing the colour of a single meshes edges, or changing the opacity of a single meshes edges?

You could customize the effect for individual meshes by doing something similar to the OutlinePass effect here: three.js/OutlinePass.js at 5ad3317bf251bf0520d73704f2af66fafb770a77 · mrdoob/three.js · GitHub.

This has a selectedObjects array, and it basically hides all meshes but the ones in the array to only show outlines on those meshes.

You could do a similar thing to change the color of only one - so you’d have an outline pass for all but one meshes, and one just for the one mesh

1 Like

@user123 pointed out an issue using this with a few models.

In certain camera angles there are missing outlines, see the top left teeth of the gear here:

image

The reason these are missing is because at this angle, the normal buffer sees the gear and the surface behind it pointing in the same direction, so there’s no “edge” there:

image

However, this should be discernible using the depth buffer:

image

The problem is (1) the depth multiplier values in my live demo don’t go up high enough. And (2) the model is pretty big, so you’ll get a better result scaling the near/far planes (or scaling down the model).

Here’s a codesandbox with updated values to get the missing outlines: cylinder outlines test - CodeSandbox

Although it still misses the subtle edge in the circle on the inside of the gear. I wonder if there will always be artifacts like that in a screen-space approach like this, and whether there may be a more geometry-based approach that can produce correct results in all cases.

3 Likes

This is fantastic.
I’ve been looking for something like this forever!

EDIT: is there a way to show a lower res render on a higher res object?
Ie: you’ve got a smooth torus, (high res), yet only want to show the quad lines for every 4 quads or so in either dimension?

There’s a couple ways you could do this. There’s no way in the shader to do something like “every 4 quads” since it’s a post process effect. What you could do is tweak the normal multiplier and normal bias parameters.

Basically you want a lower normal multiplier, so that only sharper changes in surface have an outline, but smoother changes are not visible. But this will not help in the case of the torus where each quad differs only slightly so there are no sharp edges.

The other way is to:

  1. Load in a low poly version of each mesh
  2. Hide the low poly version from the main render scene
  3. Render the low poly instead of the main mesh in the outline pass

I haven’t looked into the approach in this thread: LDraw-like edges but if that works by creating the edges on startup on the CPU, that might give you more control (so you could say skip 3 quads etc).

Thanks! Really glad to hear you found this useful. I’d love to hear what kind of project you’re using this for if you don’t mind sharing.

1 Like

cool.
thanks for the tip!
do you think what you’re saying could be made any easier / more streamlined with
https://threejs.org/docs/#api/en/objects/LOD?

Not really. THREE.LOD looks like it will automatically change what version of the mesh is displayed based on distance to the camera. You still have to load in the high res/low res versions of the mesh yourself.

Great work, thanks for the update, I will have a play

1 Like

Great!! :clap: :clap: :clap:
I will use it
Thanks

1 Like

This is a really great tutorial. It is exactly the effect I am trying for. I am really interested to use a selectedObjects array like you point out in the OutlinePass effect at the top of this thread. I am quite new to three js so I am not super confident about changes that I need to make to your CustomOutlinePass. Specifically, in your render method the first thing you do is to turn off writing to the depth buffer, but the depth buffer is used in the other OutlinePass effect inside the render function. Could you please give some indication of how to reconcile the render methods of both approaches? It would be a great help. Even if it is just pseudocode-like comments. Thanks!

1 Like

This was a bit trickier than I expected, and required an additional render pass, so I created an example implementation with some explanation here: Support applying outlines to individual objects by OmarShehata · Pull Request #3 · OmarShehata/webgl-outlines · GitHub

outline_selected

Basically the challenge here is that if you only include the objects you want to outline in the normal & depth buffers, then the created outlines will show through objects that may be in front of it. If that’s your desired effect anyway, then great! You can stick with the same amount of render passes.

Otherwise, to make the outlines get occluded correctly, we need to create an additional render pass that creates a depth buffer that has objects that are NOT outlined, which we’ll use to depth test the outlines before rendering them.

I found it helps to look at the rendering pipeline with a screenshot of what’s the output of each step:

Happy to hear if anyone has feedback on doing this in a more optimized way would love to hear.

2 Likes

I’d love to hear what kind of application/use case you’re using this effect for! I’m still considering investigating a geometry-based approach which may be better for certain use cases.

Wow, thank you so much for your incredible response. Yeah, this makes sense that it was a hard problem. My use case requires a modification to this change I believe. I am making a sci-fi game in which you command a space ship from inside the bridge. I would like the graphics to be done in the style of the show “The Expanse”. Sort of like these, where there are various blueprint views of the ships:

https://www.harrisonvincent.com/work/expanse-activation

So in my particular use case I would like to be able to highlight various meshes using different colors to denote activation, alarms, and various states of damage to parts of the ships. So to achieve this, rather than using a node.applyOutline boolean, I imagine I could use a node.applyOutlineColor color uniform instead? And then use the color passed in? Or would that somehow end up applying the same color to everything? I guess another option would be to instantiate a number of different Passes and include some sort of integer value for each and then have an integer like node.applyOutlineWithPass, and if a node has the same integer value as the Pass, then I use that one to render it. Would that work? I have never really done any post processing in OpenGL so this is all new to me.

Thanks again for your incredibly detailed response!

Thanks!

Looking at the code, it looks like the first approach I mentioned would not work because it is the second pass the does all the drawing at once? So I would need to instantiate a number of CustomOutlinePasses, one for each color, and then tell nodes which one they should be rendered by?

So I would need to instantiate a number of CustomOutlinePasses, one for each color, and then tell nodes which one they should be rendered by?

Yeah, this is the right idea. I think it’s already overkill that it takes 3 render passes to do this effect applied to individual objects separately, so if you have lots of different colors, this may not be very practical performance wise.

On the other hand, you aren’t rendering all objects in every render pass, they’re just split across. But there’s still a lot of overhead every time you need to render, capture the frame buffer from the GPU back to the CPU, then send it back and render again.

This is one use case I was considering would be better served by what I keep calling a “geometry” approach, where the outlines are themselves geometry, so you can draw as many as you want with different configurations without additional render passes (at the cost of increased mesh complexity of your scene).

If I wanted to make the lines thinner if they are farther from the camera in a perspective projection would that be possible? When I zoom out from my models they end up looking sloppily flood filled with lots of interior lines, which is improved when I multiple normalDiff and depthDiff by a scalar like 0.5. But then when I zoom in, the detail is much too fine. But if the line weight could depend on the distance to the camera I could get the best of both. Thanks!

The depthValue in the shader is a measure of how far away the current pixel is to the camera. So if you multiply (or divide?) the outline width by a factor based on that, it should give you the effect you’re looking for.

I don’t see a “depthValue” variable. Do you mean just “depth” or “depthDiff”? Or something else? Thanks

Hi Omar,

I’ve switched my code over to use three js fiber to make it easier to coordinate state in my scene. But I have not been able to get your custom outline renderer to work using fiber. I have tried to use drei, specifically:

as well as trying by using . But I am not sure how to add the CustomOutlinePass. I am sure I am doing this all wrong, but I just don’t understand the lifecycle. Have you ever tried to use Fiber with custom post processing?

Thanks! Here is my code:

SceneViewer.tsx:

import * as THREE from 'three';
import ReactDOM from 'react-dom';
import { Effects, OrbitControls, PerspectiveCamera } from '@react-three/drei';
import React, { useRef } from 'react';
import { Canvas } from '@react-three/fiber';
import SpaceShip from './scenes/SpaceShip';
import { CustomOutlinePass } from './CustomOutlinePass';

export default function SceneViewer() {
  const WIDTH = 1600;
  const HEIGHT = 1200;
  const camera = useRef(null!);
  const scene = useRef(null!);
  const composer = useRef(null!);

  // Outline pass.
  const customOutline = new CustomOutlinePass(
    new THREE.Vector2(WIDTH, HEIGHT),
    scene.current,
    camera.current
  );
  composer.current.addPass(customOutline);

  return (
    <div style={{ position: 'relative', width: WIDTH, height: HEIGHT }}>
      <Canvas>
        <Effects ref={composer} />
        <PerspectiveCamera
          ref={camera}
          makeDefault
          position={[0, 200, 0]}
          up={[0, 0, 1]}
        />
        <OrbitControls
          enablePan={true}
          enableZoom={true}
          enableRotate={true}
          target={[0, 0, 0]}
        />
        <ambientLight />
        <pointLight position={[10, 10, 10]} />
        <scene ref={scene}>
          <SpaceShip />
        </scene>
      </Canvas>
    </div>
  );
}

SelectableModel.tsx:

import * as THREE from 'three';
import ReactDOM from 'react-dom';
import { useGLTF } from '@react-three/drei';
import React, { useState } from 'react';

export default function SelectableModel(props) {
  const gltf = useGLTF(props.modelType, true);
  const [hovered, setHover] = useState(false);
  const [active, setActive] = useState(false);
  return (
    <primitive
      object={gltf.scene}
      position={props.position}
      scale={active ? 1.5 : 1}
      onClick={event => {
        setActive(!active);
        event.stopPropagation();
      }}
      onPointerOver={event => setHover(true)}
      onPointerOut={event => setHover(false)}
    />
  );
}

SpaceShip.tsx:

import * as THREE from 'three';
import ReactDOM from 'react-dom';
import React, { Suspense } from 'react';
import MainSection from './models/MainSection.glb';
import Box from '../common/Box';
import SelectableModel from './SelectableModel';

function SpaceShip() {
  return (
    <Suspense fallback={<Box />}>
      <SelectableModel modelType={MainSection} position={[0, 0, 0]} />
    </Suspense>
  );
}

Box.tsx:

import * as THREE from 'three';
import React, { useRef, useState } from 'react';
import { useFrame } from '@react-three/fiber';

export default function Box(props) {
  const mesh = useRef<THREE.Mesh>(null!);
  const [hovered, setHover] = useState(false);
  const [active, setActive] = useState(false);
  useFrame((state, delta) => (mesh.current.rotation.x += 0.01));
  return (
    <mesh
      {...props}
      ref={mesh}
      scale={active ? 1.5 : 1}
      onClick={event => setActive(!active)}
      onPointerOver={event => setHover(true)}
      onPointerOut={event => setHover(false)}>
      <boxGeometry args={[1, 1, 1]} />
    </mesh>
  );
}
1 Like