Shade - WebGPU graphics

Thanks for sharing, this is a project I am interested in (for commercial purposes), so it’s great to see it live! A couple of comments:

  • Zoom doesn’t seem to work (middle mouse)
  • To my eye the bloom appears to just washout the scene
  • It doesn’t work at all in firefox, I guess that’s a limitation of that particular browser?
  • In Chrome/edge I find the performance to be pretty much unusable on my laptop, not getting above 5fps. Interestingly (or maybe not) the “triangles_visible” is constantly changing (when camera is static), going up and down between ~21100 - ~21300. With everything off (shadows etc) its around 60fps.

Whilst my laptop is old now, it usually runs all but the most complex things with no issues (Win10 Gtx1050)

@user123

Thanks for the feedback!

regarding Firefox, they still don’t have WebGPU support on main release

Considering Google money disappearing from Mozilla, I suppose we’ll be waiting for a very long time. That, or Firefox will just disappear in the next few years ( % of the market will shrink to nothing ).

Thanks, I tweaked the bloom a bit more using different mix strategy, will push changes in the next demo, but it’s a lot less pronounced overall now.

Yep, RTX is expensive, and it scales with scene complexity, so it only gets worse as scene gets more complex. It’s a well-known fact, unfortunately, and considering that I’m emulating RTX using compute shaders instead of using native API - the performance issues are even more severe. To name a few things that native RTX API does for you that is hard/impossible to do using compute:

  1. command sorting. By sorting rays based on orientation and origin, we get ~20-30% performance boost on average
  2. specialized BVH traversal hardware, this is a big one, hardware traversal is an order of magnitude faster for various reasons.
  3. hardware intersection testing. Don’t have figures, but it’s much faster.
  4. specialized BVH format. My implementation is 40 bytes per BVH node, which is not optimal, but best implementation you can get goes as low as 3 bytes per node or so, you can throw hardware compression on top of that. Memory access happens to be the biggest bottleneck here, so smaller format translates pretty directly to faster RTX

So yeah, RTX is slow, and emulated RTX is just too slow, sadly. I’m working on SDF-based shadows isntead currently, those are harder to implement, but performance is much better and scales independently of scene complexity.

This is actually correct behavior. The reason behind this is TAA, we jitter camera position within 1-pixel bounds every frame, so what’s visible changes, as well as changing results of occlusion culling which is discretized, so there will be different amount of triangles culled if we move the camera even slightly.

If you check Unreal, you’ll see the same behavior.

This is pretty good hardware, my intention is for the engine to run pretty well on this kind of hardware. I’m glad to hear that without hte shadows you get 60 FPS, just need to sort those out now :sweat_smile:

1 Like

Thanks a lot for the informative response!

Would this mean the scene is never idol, thus constantly rendering?

yes, but it’s not really unique or a limitation compared to non-TAA option.

That is, basic three.js WebGLRenderer will keep rendering every display refresh cycle, nothing might change, but you’re still paying for processing every mesh, every vertex, every pixel, every single refresh cycle.

Similarly, if you wanted to stop rendering - you could, and you can with Shade too. The key is that taa performs integration over time, and because of various quirky reasons each jitter frame is slightly different after accumulation, there’s no 100% rock-steady TAA implementation.

The flip-side is that TAA is literally 4-8 times cheaper than most alternatives, as far as AA goes, while providing comparable or better results and working with pretty much every post-process effect.

Anyway, nothing really special here. Can stop rendering, can keep rendering - it’s a user’s choice.

2 Likes

Tried out Oren-Nayar diffuse model, it’s supposed to be better for things like brick, chalk and fabrics. Things that reflect very very diffusely.

Here’s what I get:


Hard to spot any difference, but first is Oren-Nayar and second is Burley (close to Lambert)

Here’s diff:

You’ll notice that curvy bits have the most difference and glancing angles. Oren-Nayar looks more flat overall, which is apparently more physically accurate based on what I read, but pretty much nobody uses it in production, even though it’s

  1. About same compute cost as other techniques
  2. Was known since 1995 (original publication)

I reckon it’s because results are less visually interesting generally, due to that flat look

Here’s a more obvious example, first is Oren-Nayar again, second is Burley


I’m not sure if this is obvious or not, but the scene looks more “flat”, because there is less darkening and highlights at glancing angles.

here’s an image from wiki for better illustration

Anyway, I was curious to see what the model would look like in engine. As a read about it a while ago and I was thinking to myself, “why aren’t we using it if it’s more physically accurate?”

Anyway, I think I’ll keep Burley for now, as it helps with depth perception a bit better due to more variation on the edges of objects.

4 Likes

On a side note, in your posting, as a programmer and an artist, I really really like your pirate island model. Its perfect for demonstrating rendered graphical quality. I wondered if this was a privaye or open source model. I could not find a reference on sketchfab. If publicly available could you reference where?

P.S. I really enjoyed what you accomplished with Meep.

1 Like

Would the oren-nayer/flatter look leave some headroom for some AO to provide a stronger silhouette?

1 Like

There are two that would fit that bill, based on that description


Sea Keep “Lonely Watcher” by Artjoms Horosilovs


Flying world - Battle of the Trash god by Konstantin

In general it’s a bit of a task to find good-looking scenes, I’ve collected quite a library over the years while working on different techniques

We work on this or that interesting graphics technique, but at the end of the day without amazing art it’s hard to show off, and the whole point of most of these techniques is to enhance such art

3 Likes

I tried, but couldn’t get significantly different results. Major difference occurs with the light side on, on curved surfaces.

Regarding SSAO, I don’t think it would do too much, because it will generally be outside of the edge of an object, not inside, if that makes sense.

But it was an interesting idea, I did spend a couple of hours trying to answer that question, but yeah - “inconclusive” for now.

1 Like

Do you have a version of the “Flying Worlds” model posted somewhere?? The original has been moved to “Fab”?? I guess a version of sketchfab. I am not ready to buy assets as mush as test and vet my game software. If somehow, somewhere, in some way, this violates some legalese stuff please ignore the request.

Revisited TAA recently, and found a few ways to reduce disocclusion error. Also moved color clamp into perceptual space instead of linear (basically tonemapping before clamp)

Here are a few screenshots, intentionally tiny to show TAA’s effect, first is without TAA and second is with:

Sponza


PBR Spheres


Hairball


Flight Helmet


Trash God


The cool thing about TAA, and what fascinates me the most, is that it doesn’t really make rendering more expensive, so this effect that makes objects look as though they were rendered with much higher resolution is achieved essentially for free.

Also, unlike FXAA and other non-temporal techniques, TAA’s edges are stable and smooth. FXAA essentially just imagines true shape of edges, and every frame you get different results if an object or the camera moves even slightly.

MSAA (what we have in WebGL by default) is cool, but it isn’t free, it renders X-times more pixels (samples) around the edges, and it increases the cost of rendering for everything else, due to the multi-sampled nature. It notoriously doesn’t play nice with post-processing tecniques either.

4 Likes

No particular updates. Was looking for new set of test scenes, and thought I’d share a few screenshots.

Here’s one called “vroom vroom”:

Here’s the same thing, but with all post-processing turned off

Contact shadows disappear because SSAO was doing a lot of heavy lifting, and metal parts look dull because SSR was doing a lot to make them pop

Next without global illumination

Overall the thing is darker and colder, because we’re losing light bounce and light is on the warm side here.

Next let’s turn Anti-Aliasing off to get the raw look

Again, the full-fat version for comparison

And for fun here’s three js r168

And here are some more screenshots of random scenes


5 Likes

Added support for HDR environment maps, mostly the effort of converting them into the format that Shade works with.

Also worked a bit more on the global illumination, added infinite light bounce, so light gets pretty much everywhere now. Still a few techniques I’d like to add such as resampling of rays, but it’s already in a good state and is pretty stable.

Here are a few shots (off/on):


If anyone is curious about the environment mapping. I was frustrated with the cube maps, as I make extensive use of directional maps. So I’m encoding environment maps to octahedral projection like so:

The starting point is a standard equirectancular map

There is a cost to conversion in terms of quality, as we lose some resolution certain areas, but I found this not to be an issue.

The benefits are:

  • lower angular error around edges, that is - texture spaces is more efficiently used
  • You have a 2d texture instead of a cube map, which is way easier to work with, especially when you need to write to it, such as during convolution.
  • octahedral mapping is dirt cheap in the shader

The GI solution is slightly changed from before. I was struggling to get good results with progressive upgrades when I was using spherical harmonics, for various reasons. So I gave up and jumped on the band wagon of just keeping an atlas of octahedral maps for each probe.
I rewrote the rendering part for them to generate a G-buffer using ray-tracing, and then reuse a lot of the same code for shading. During shading of the probe texels I sample probes again, which gives me that sweet infinite light bounce.
To get stability I do a simplified version of TAA.

Everything is done on the GPU, including probe placement generation. The limit for number of probes does exist, due to memory limitations, but it’s stupidly high, at 65,536 for low-end hardware. If you need more, you also have an option of dropping the probe resolution, which will reduce GI precision a bit, but give you more probes to work with.

Updates are incremental. I don’t have any fancy logic for now, just updating a fixed number of probes each frame, but it’s configurable, again, so you can adjust it to what the user’s hardware can handle comfortably.

GI is very responsive, I didn’t do super precise measurements, but updates to lighting propagate fully in ~30 frames. This is mostly thanks to TAA.

Right, also the probe placement is automatic and can be updated at runtime if scene changes. You need to tell the engine your desired resolution for the scene, and it will place probes roughly on a grid of such resolution, removing probes that are nowhere near anything and moving probes around a bit to make sure they don’t get stuck in walls or tight corners.

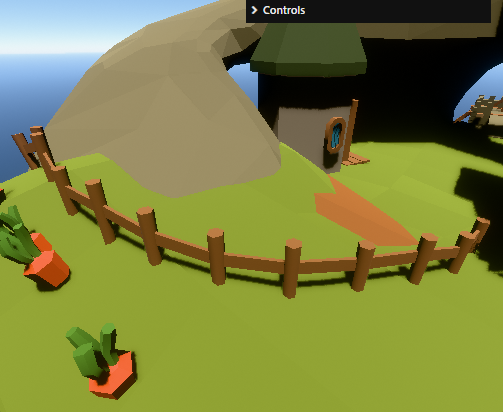
Here’s a crappy visualisation of probe placements


You can see these ones having been nudged into better positions

This is not particularly complex stuff, but it does require you to have spatial index on the GPU, which I happen to have already so - easy win.

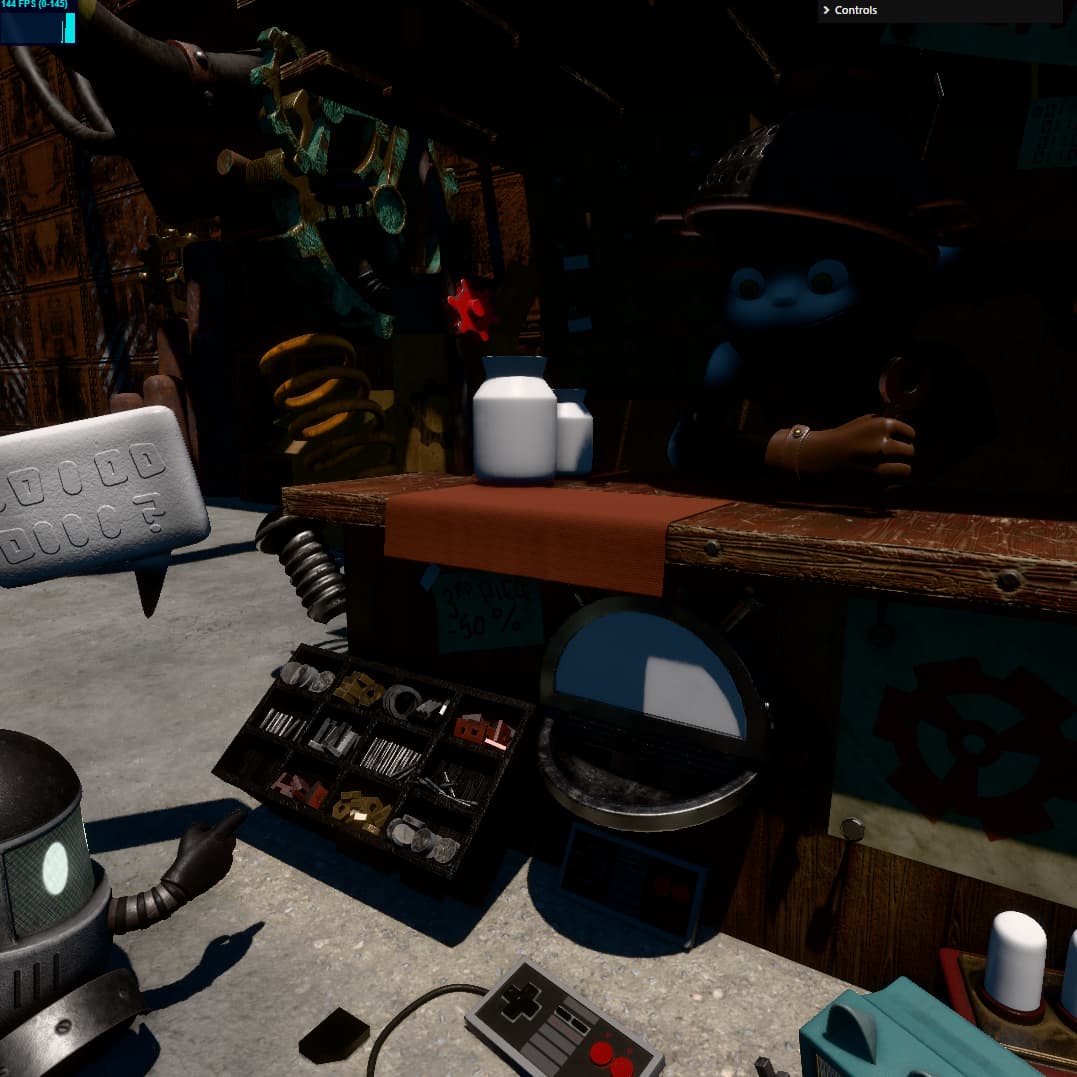
To show that probe placement is not limited to box-ish scenes, here’s the Battle of Trash God:


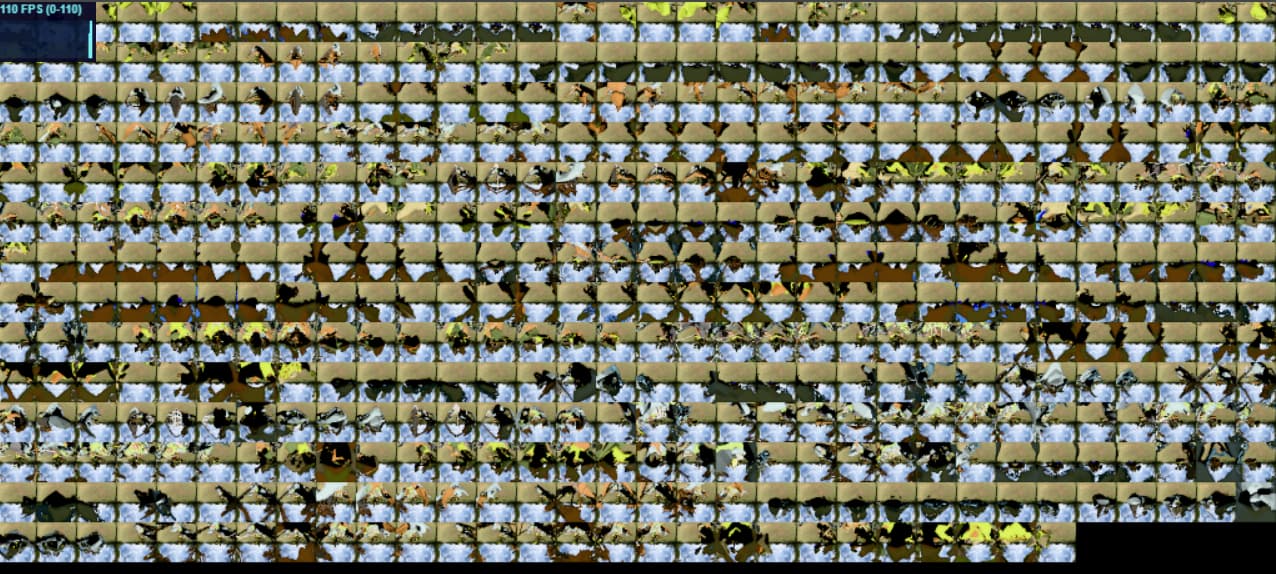
Here’s the probe atlas looks like:

but the resolution for each probe is overblown here to 128x128, in reality we use 8x8 pixel probes, sounds mad - I know, but it’s 64 individual samples, and we accumulate them over time, so it’s plenty.

Here’s 64x64 atlas

32x32

and finally 8x8 what we actually use

there are 8553 probes packed here.

Here’s what that looks like:

If we drop probe resolution to 4x4:

at 2x2 (yes, this is only 4 pixels per probe):

And here’s without GI

Basically as resolution drops too low - probes become “blurry”, they accumulate light from too wide of an angle, and start to approximate point light sources.

8 Likes

Spent more time working on Global Illumination

After watching an excellent presentation by Jakub Kolesik on Global Illumination in Enshrouded and re-reading Unreal’s slides on Lumen from SIGGRAPH, I had an “Aha” moment.

I was vaguely aware of specular component to GI, but it was always something I thought to be very expensive and out of reach. But having transitioned to doing irradiance via octahedral textures, I realised that I actually have radiance already.

The textures in the atlas are actually radiance, and I convert them to irradiance via filtering and conversion to spherical harmonics.

So I dropped environment map sampling entirely from rendering. Environment is only sampled during radiance probe update, and you get it in the final image from there.

Here’s the result, with environment sampling:

And here it is without environment sampling, instead getting reflections from radiance probes:

You’ll notice we still have pretty good reflections, but now we also have bounce reflections:
image

Those gray dots are other spheres being reflected
image

To illustrate the importance of specular indirect lighting, here’s just the sphecular indirect:

Here’s just the direct specular

As you can see indirect is super important.

The problem with environment map sampling is less obvious here, sure, it’s nice that we get multi-bounce specular reflections for free, but are environment maps really that bad?

The answer is sadly - yes. I’ve been staring at Sponza a lot, as one does. And it kept bothering me that environment map reflections are all messed up, because they don’t test visibility:


Yeah, that’s really unpleasant. Here’s the same thing with radiance cache being sampled instead:


here’s the same shot with different sun position:


if we move camera back a bit


To put it back together, here’s just the direct illumination:


Indirect diffuse

Indirect specular

final gather

6 Likes
  • Sorted out some biases in the lighting calculations of the irradiance field. Essentially was causing light leakage
  • Added parallax correction to specular reflections. They are still limited by the probe resolution, but it’s pretty incredible how far you can get with a bit of basic geometry

Here’s the effect

And without the GI

You can see specular relections on the sides of the columns

5 Likes

Did a bunch of optimizations to ray tracing, please give it a spin. Would be would thankful if you could share your perf stats:

Demo Link

image

There’s also GI going on here, you might notice a bit of flicker as a subset of probes is updated every frame. You can toggle the GI on and off via the menu.

You can find more detailed stats in the console, specifically I would be I would be very interested in number like this:

primary shadow rays : 878.53 µs

Along with:

  • your resolution (either window, or if full screen the screen resolution)
  • your GPU model
  • your OS

Thanks!


Controls:

Mouse Left - Camera Rotate
Mouse Right - Camera Pan
Mouse Wheel - Zoom
ASDF - Camera Move

1 Like


1920x1080, Nvidia GeForce GTX 1660, windows 10, amd ryzen 7 3700x

1 Like

  • HD 1920x1080
  • Nvidia RTX 2070 Super
  • Ubuntu 24.04
1 Like

My bad, I thought bytesPerSample of 64 was pretty moderate, now thinking more about it - it probably isn’t. I shuffled things around a bit and got it down to 32. So should work now.

@Chaser_Code

Also, the console data was stripped out, I put it back in, sorry about that :sweat_smile:

The FPS on GTX 1660 seems low, not sure exactly why. What is it like with the GI off?

1 Like

GI off 30 FPS, GI on 18 FPS

1 Like