Virtual Textures

TL;DR; demo

Why are Virtual Textures?

The basic idea is to take a very large texture that would typically not fit into memory, say 16,000 pixels by 16,000 pixels and be able to use it. Why would you want to? A typical example is ground textures in games, if you played a game like FarCry, or, heck, even World of Warcraft, you’d have noticed that the ground doesn’t look the same in a seemingly vast world. Some people might have wondered “How did they fit such a big texture in memory?”, the answers to that would vary, and traditionally we would have used Splat Mapping to achieve a lot of variation. But that’s a cheat and it doesn’t scale beyond a certain level.

What do we do if we want a truly large texture with a lot of custom detail? - this is what virtual textures try to address.

Probably the most famous example of Virtual Texture usage is Google Maps, the actual source textures are ~20 Petabytes, that’s 20,000 Terabytes. Yet you don’t have to wait for all of that to load when you use the service, and it runs pretty quickly.

The technique was, arguably, first popularized and properly defined by John Carmack when working on Rage at id Software. According to John, he wanted to enable a high-resolution world, where there you could walk up to a rock and still see a ton of detail. On top of that, the team wanted to bake high-resolution light maps for the entire game. I’m sure the fact that it’s a really cool tech had nothing to do with it [cough].

At the time, Carmack called the tech “Mega Texture”. Later on, researchers settled on calling the tech “Virtual Texture” or “Sparse Virtual Texture”, although if you ask me - the “Sparse” part is pretty redundant.

What are Virtual Textures?

Virtual texture does for a Rendering Engine what Virtual Memory does for a typical Operating System.

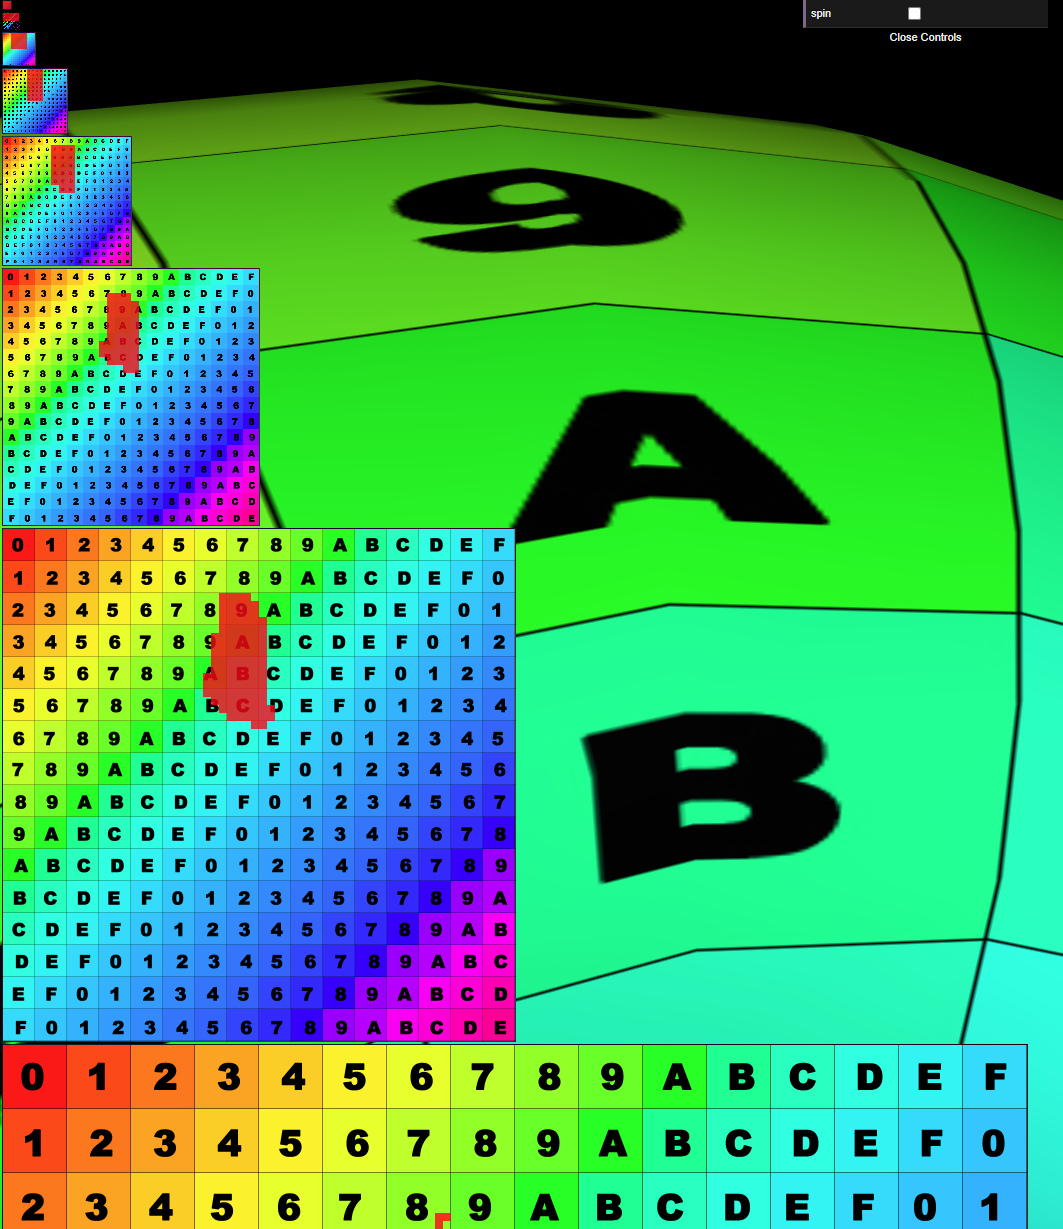
Virtual Memory operates on “Pages”, a page is a fixed-sized chunk of memory, something like 4Kb. Following the analogy, a Virtual Texture operates on “tiles”, which are fixed-sized pieces of the original texture.

Because of this, Virtual Texture tech is typically split into offline and online parts, where offline part refers to preparing a set of tiles out of the original texture and offering various authoring tools. The online part is the rendering, basically.

I’m not going to talk too much about the offline part here, except to say that it gives us an opportunity to create high-quality mip-maps, for this demo I’ve coded up Kaiser filter (same as Unity) with source supersampling, that is - filter takes original image as an input every time, instead of using a previously downsampled image.

Here’s a 512 MIP of an 8k texture generated by WebGL:


And here’s one generated using kaiser filter:

Here’s a closeup for reference:

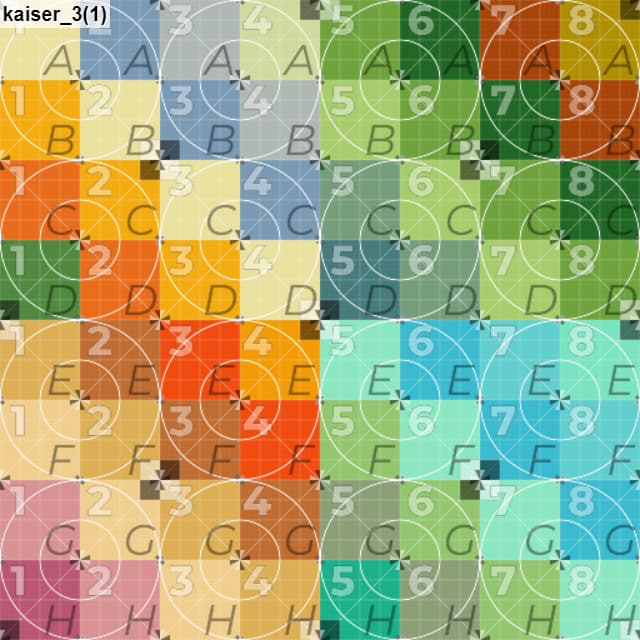
Here’s what the final breakdown of that 8k texture looks like:


Incidentally, there are exactly 5461 tiles, 128x128 pixels each. Why that many?
8192 / 128 = 64, that is, the texture needs to be cut into 64 tiles along each axis, that is 64*64 = 4096 tiles in total, then we scale the image down to half the size and repeat the process all the way down to a resolution of a single tile:
4096 / 128 = 32, 32*32 = 1024
2048 / 128 = 16, 16*16= 256

First time I saw a virtual texture demo for WebGL was around 2014 I believe, and I was dissatisfied. Back then, I ran it on my GTX 660Ti and I thought it was slow as sin. I was dissatisfied with the runtime performance, the FPS was super low, I was dissatisfied with the loading times, tiles were being loaded but not the right ones, there was no prioritization and the piece of wall I was looking at 1 minute ago was still in the download queue, blocking the stuff I was looking at now. I kept thinking about it though throughout the years, I even wrote some simple prototypes testing out this idea and that. Recently I had a bit of motivation to put an end-to-end proof of concept together, and I’m pretty happy with how it turned out.

The prototype runs at a very good framerate, at least on my iPhone 8. I implemented a pretty sophisticated algorithm for prioritization of tiles, and I implemented a priority loader with its own queue that keeps the system responsive even in the face of relatively poor network performance. I added a cache in between the network layer and the physical memory layer that lets us reuse tiles without having to download them again, this may seem obvious, but this cache has a limited size, meaning that you as the user get to control how much RAM you’re willing to give up for tile caching versus having to go to the network.

Anyway, I figured that screenshots and videos can only get you so far, and I’m a strong believer in actual demos, so here it is:

image

Demo

The demo uses the aforementioned 8192x8192 texture split into 128x128 tiles. The “Physical Texture” here is 2048x2048 which is just 1/16th of the size of the original texture. Cache is set to 128Mb, which is not quite enough to contain the entire tile set for this demo. The tile set takes up 128*128*4*5461 bytes = 357.9 Mb.

As a stress-test I also tried splitting the original texture into 32x32 tiles, which results in 87,381 tiles. It works well too, but the tech is not really intended for this, typically people use 128 or 256 tiles, based on the literature that I have read. When you put this on the web, smaller tile sizes make even less sense as network latency will kill your performance downloading thousands of tiny files.

8 Likes

That’s some amazing technique, and very fast too! Between this and your virtually geometric demo, you may be able to fit anything at any resolution in a single scene (I bet you already on it right? :wink:)

4 Likes

@Oxyn I was thinking about that, he’s laying the foundation of a next gen ThreeJS and I love it.

4 Likes

Looks great :slightly_smiling_face: and similar like the technique i use for tile rendering for Tesseract - Open World Planetary Engine. But i actually either render PBR maps or spatial alpha splatting.

Using the latter additionally has the benefit of higher resolution for lower resolution generation at fixed 4 materials layers. But just a month ago i also started using baking of the final maps for the simple reason of using true unlimited materials, as using a texture atlas is limited in size and there it is harder to swap materials. By baking the result stays as long as rendered.

However my main focus around static data streamed mainly is around sparsely user created content, relying on static can be too heavy for browser games, especially when they also also user created content.

2 Likes

That sounds interesting, what do you mean by “baking”? Baking in-engine at runtime, or doing it somewhere on the server-side? Or offline entirely?

I’ve got splatting too, but I always felt that it was a bit limiting, although it is an amazing tech.

It’s true that virtual textures are more suited to static content, but they are not limited to static content. In fact - nothing stops you from writing texture data in-engine at runtime. In fact, that’s what a FarCry guys did, they called it “Adaptive Sparse Virtual Textures” or something like that.

Unreal Engine 5 uses virtual textures in “Lumen” (the lighting tech) for shadow maps which are totally dynamic.


On another note, I’ve been struggling to find a good image for a proper demo to show-off the tech. So far, I could only find a (close-to) 16k resolution map of World of Warcraft, which seems to be in the public domain.
So here’s an updated demo of that

image

2 Likes

Are you secretly working on WebGL/WebGPU export for Unreal Engine 5? First virtual geometry, now this… :joy:

Joking aside, this is jaw-droppingly cool. I am speechless. Very, very, very well done Alex.

2 Likes

Here’s another DEMO, this type it’s Assassins’s Creed: Odyssey, the map of Greece.

It’s a 32768 x 32768 pixels. It would take 4 Gb of GPU memory if we were to load it as a normal texture, and the image itself, even as a PNG takes up 804 Mb, which would take a pretty long time to download for most people.

To put this into perspective, a normal 3d model might use a 2k color texture, you can fit 256 such textures into this massive 32k texture, that’s the kind of scale we’re talking about.

Although, of course, the tech is designed for much larger texture sizes in general.

I also managed to hunt down a few numerical instabilities in the shader which were causing occasional artifacts.

4 Likes

I thought it might be interesting to talk about how I got here.

I wrote a basic shader that outputs UVs and texture MIP level, figuring out if that was right or wrong was a pain. First I tried playing with false colors, then I started writing proper tools for debugging.

Here’s the first attempt

Let’s visualize the mip map of used tiles

All of this is, except for the shader, is done 100% in JS so far, so that I can step through the code with the debugger.

Let’s add a texture so we can have a better frame of reference

9, A and B are visible inthe viewport, and we can see that they are picked up by the shader correctly as well, judging by the debug view.

Let’s try with some organic textures

Now, at this point, I was wondering if using a doughnut (torus) is really the best way to visualize what’s going on. It’s really hard to wrap my head around where the UVs should be (no pun intended).

So I tried loading a real mesh:

Looks good. Up until this point I didn’t actually cut the texture into tiles, so all of the tiles were just virtual and rendering was done using original textures. So lets make some actual tiles

Let’s code up physical memory representation that would hold our tiles. Again, this has no WebGL code, just good old-fashioned JS, divs and canvas.

Time to move away from the doughnut, let’s try a a plane

Looks good so far, lets move this over to WebGL

Looks okay, no filtering though, lets add filtering

Umm… Okay, that’s not quite right. Filtering produces artifacts because we sample outside of the tile region. Totally expected though.

I know, I’m a smart guy, I can just write a bilinear shader, easy-peasy

That’s some pretty cool looking abstract art, but not what I had in mind…

Okay, turns out writing a bilinear sampling shader for this specific case is a lot more pain. Lets do what others do and add a border around each tile, so there’s some space for sampling outside of the tile area

That looks pretty good. And at this point I was happy enough to publish this as a demo. If you click the first link in this thread - this is what you will see. However, there’s an issue here if you use a non-grid texture:

If you look around the eyes and the tip of the nose - you’ll see tile seams. Why? Well I wondered that myself too.

What I did, which I thought was very clever, was loading a tile that’s say 32x32 pixels in this case, placing it in the center of it’s slot, and flood-filling the borders with the same color as the edge of the tile. It actually looks pretty good if you don’t look too closely. It only starts to pop when you zoom all the way down to LOD 0 and keep zooming in. Until that point it’s really hard to spot.

So, to fix this I re-worked my tile generator to include original pixels as a border. So for example, if the tile size is 32x32, and I want a 4 pixel border, I instead cut a 40x40 pixel piece, the extra 4 pixels on each side are the border.

This works well and eliminates the seams:

Did I mention that we get anisotropic filtering for free as well?

And that’s all up to this point. I’m pretty happy with how it turned out

2 Likes